For our exercise in social network mapping, we’ll use the cloud service Kumu (if you haven’t set up an account yet, do so now). Kumu is a good tool to use for exploring and showing connections among people, concepts, etc.
In what follows, I’ll walk you through how I used Kumu to map connections between students at Manchester Academy and the library books they borrowed in the year 1845, as seen in the visualization above. The visualization we’ll create will help us look for ways that books might connect students—we’re looking, in effect, for communities of readers.
The data for this visualization comes from Dissenting Academies Online. That site doesn’t provide a way to bulk-download search results, however, so first we’ll have to scrape the site. We’ll use the Scraper plugin in Chrome to grab information from the site and then bring that information into Google Sheets for processing in preparation for sending the data to Kumu.
Part I – Scraping Dissenting Academies Online
Before we can worry about getting data out of a web site, of course, we first have to figure out what data we want. I considered a few different starting points (e.g., all the people who borrowed a particular book; all the people who borrowed all the other books that people who borrowed the first book had also borrowed; etc.) For this example, I settled on finding all the records of all the books borrowed in the year 1845—I’m looking at a group defined by having been at Manchester Academy at one particular point in time. I decided on this question in part because the process of scraping that data is a little more straightforward than some of the others I considered. You can get any data you want from the site using different combinations of the techniques I’ll describe here, but some scenarios are more complicated than others. My hope is that this simpler case will illustrate the techniques more clearly and, if you want to do something more complex, you’ll have building blocks to work with.
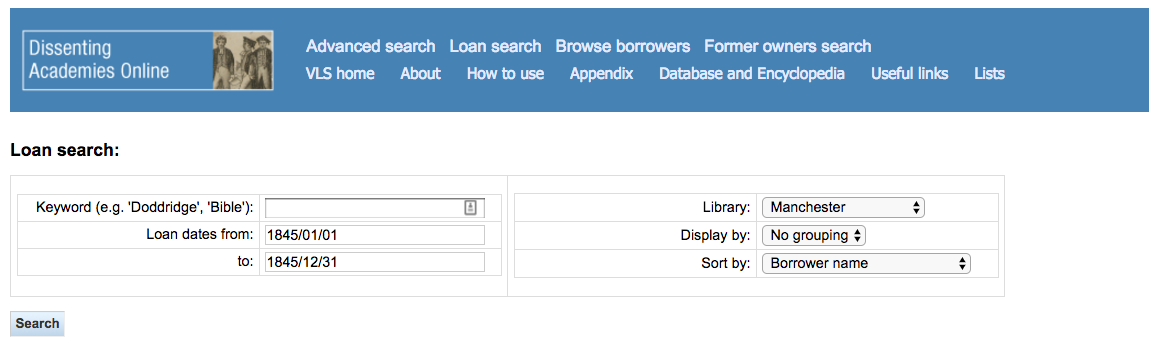
I began at the “Loan search” page and searched for all records with loan dates between 1845/01/01 and 1845/12/31 from the library of Manchester Academy. (I should really have consulted with Dr. Bankhurst to figure out the dates of the academic year—something like 1844/08/15 to 1845/07/31 might have been a better choice. Oh well.) [Note: for this and all other screen shots, you can click for a larger image.]
This search produces 327 results. To get those results off of the page, we’ll use the Scraper extension in Chrome (if you haven’t installed it yet, check the instructions). To use Scraper effectively, we need to understand a little bit about how web pages are structured. In Chrome, select View > Developer > Developer Tools to have a look at how this page is assembled.
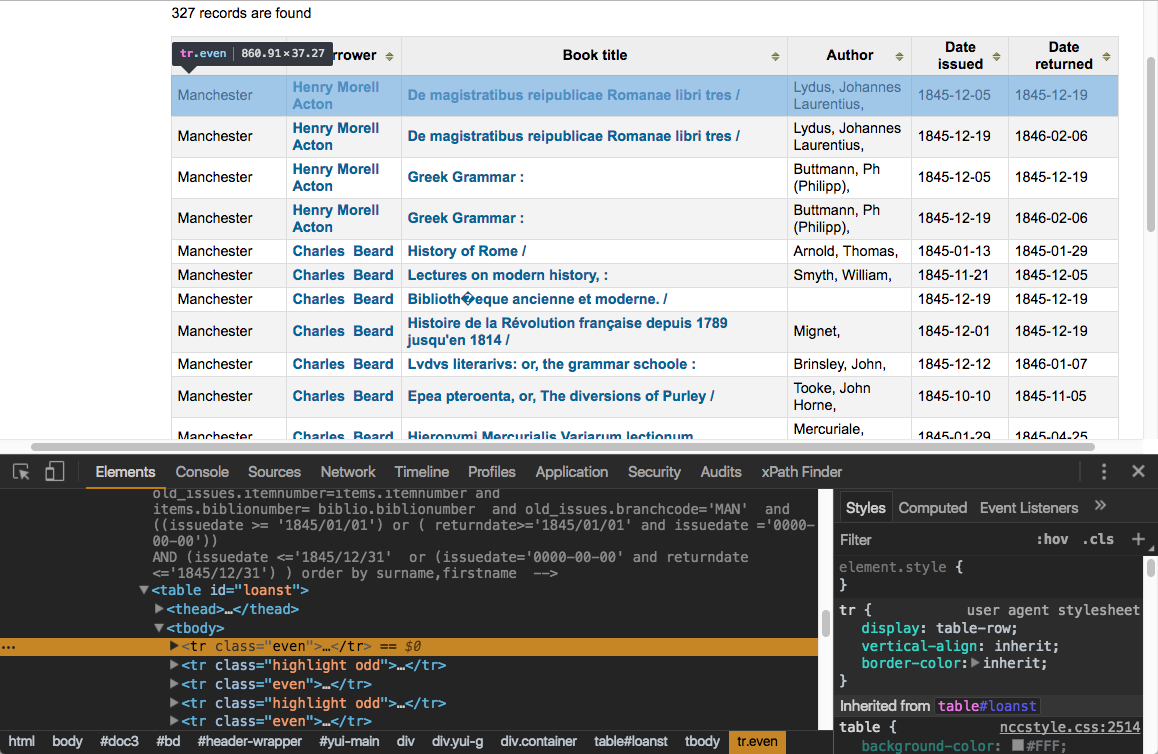
With Developer Tools open, you can use your mouse pointer to highlight different elements of the page and see the HTML that’s responsible for that element. (Click the icon that’s circled in red, below, to activate this feature.)
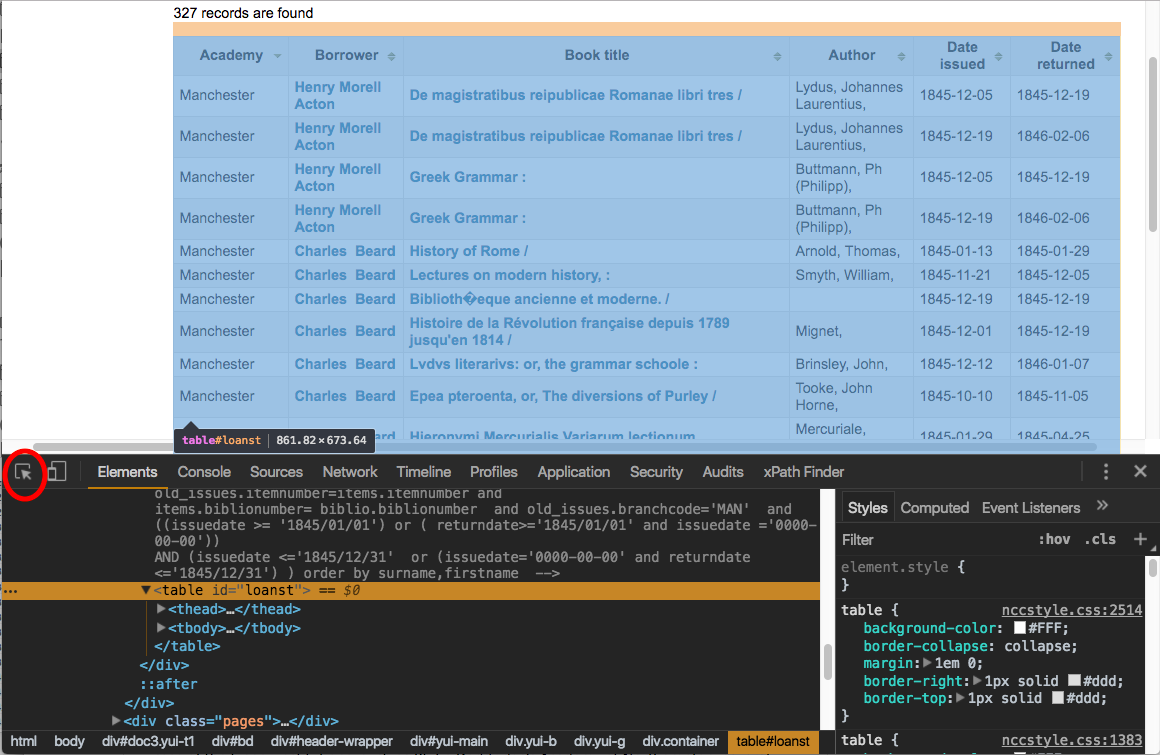
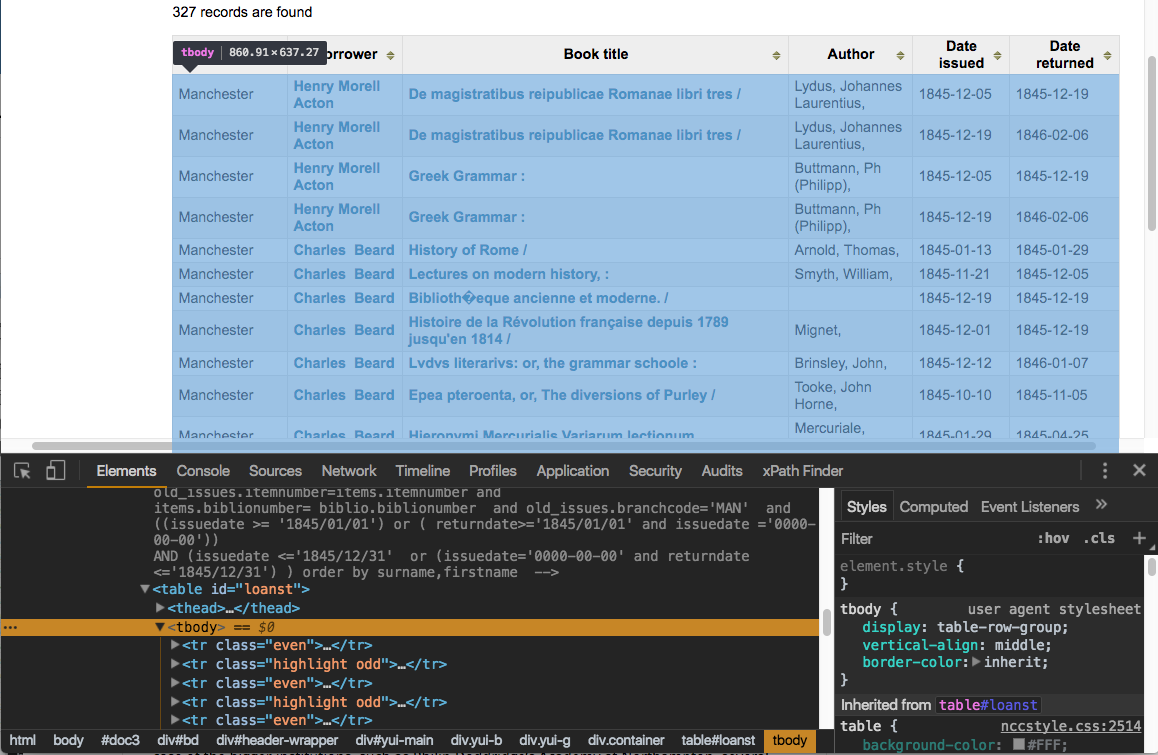
As you can see here, all our results are in a table element with the id “loanst.” All the contents of the results table prove to be contained in other elements that are nested inside the table element:
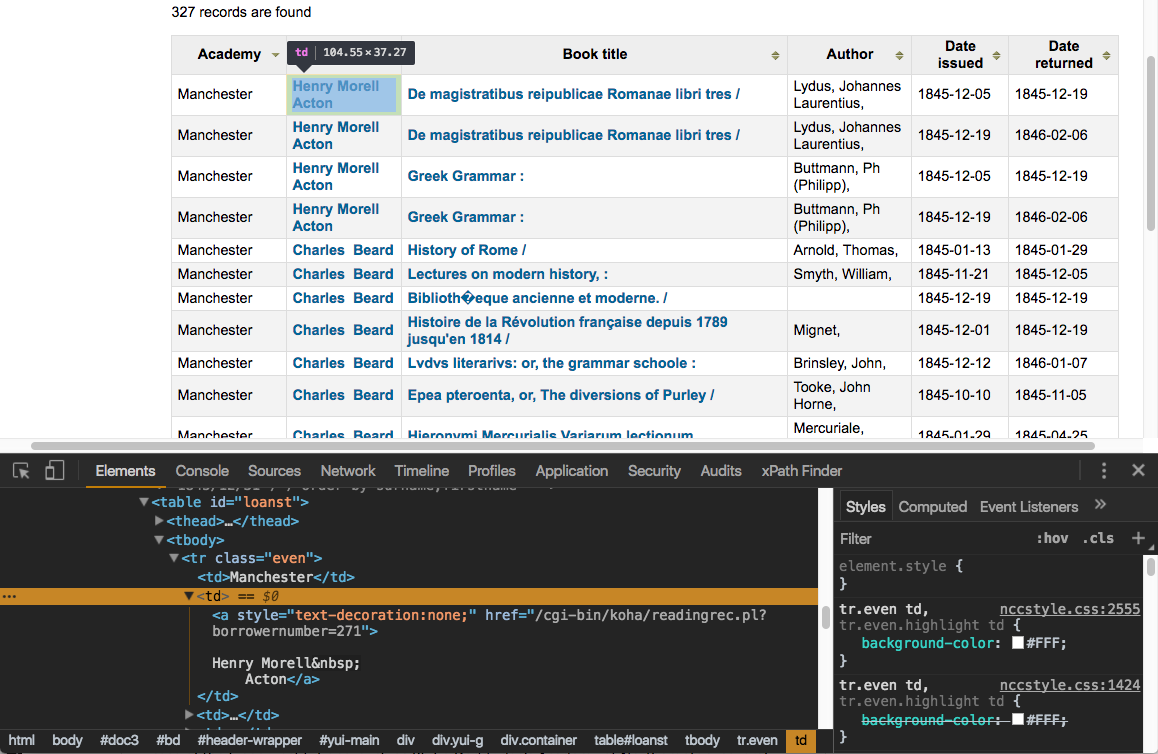
What we’re looking at here is called the Document Object Model (DOM). To specify the particular elements on the page that we want to scrape with Scraper, we’ll use something called XML Path Language (XPath).
Navigating the DOM with XPath can be a little confusing at first. I recommend installing the xPath Finder extension for Chrome to help out with this. There are other extensions that do pretty much the same thing, but I’ve had good luck with this one, and I like the way it integrates into Chrome’s existing Developer Tools pane, rather than spawning another pop-up or panel.
Once xPath Finder is installed, you can right-click on an element on the page and choose “get xPath.” The full XPath for the element you selected will then be visible when you switch to the xPath Finder tab in Developer Tools:
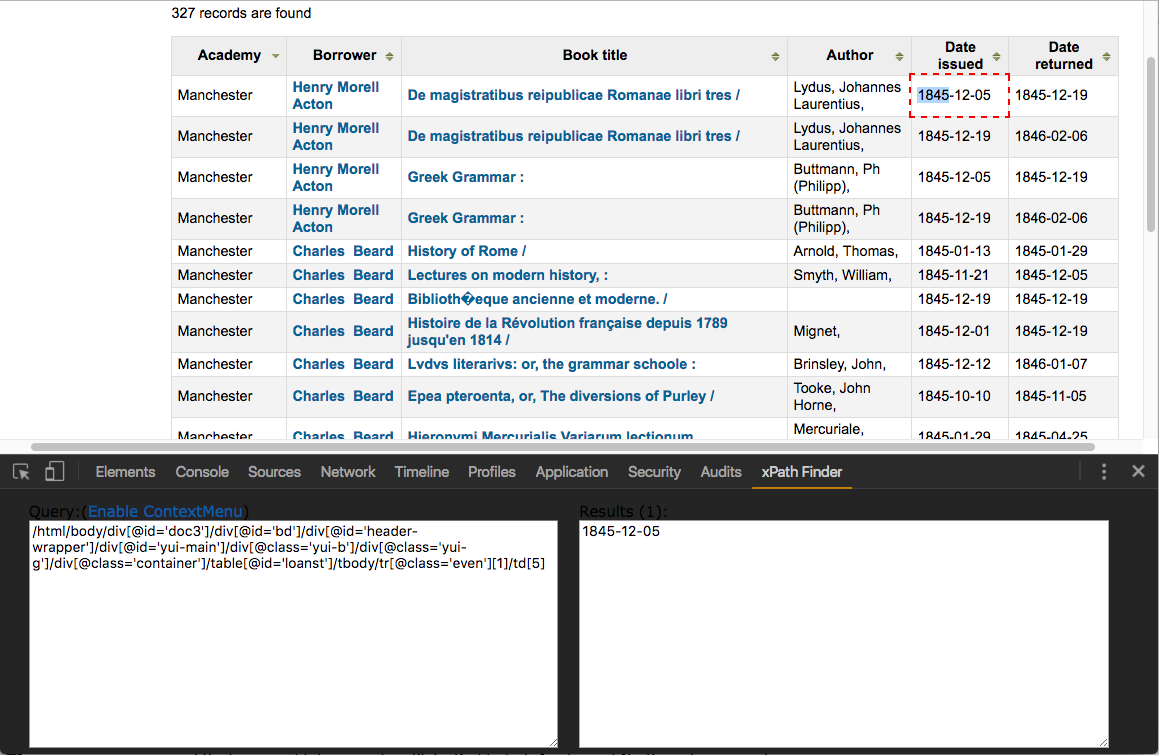
Yes, I recognize that that looks utterly bewildering, but don’t worry: there are a few tricks that mean we’ll rarely have to deal with an XPath that long or complicated. This XPath is starting at the very top of the DOM and noting every step along the way as we make our way to this specific table cell. The first thing to note is that we don’t positively have to include information about things like ids and classes: since there’s only one table on this page, we wouldn’t have to specify table[@id="loanst"]; table would get us the same result. (Note, though, that we’ll sometimes find including that extra information highly useful.) The second thing to note is that we can use two slashes to skip over layers of the DOM so //table/tr/td[5] will get us the same result as /html/body/div[@id='doc3']/div[@id='bd']/div[@id='header-wrapper']/div[@id='yui-main']/div[@class='yui-b']/div[@class='yui-g']/div[@class='container']/table[@id='loanst']/tbody/tr[@class='even'][1]/td[5].
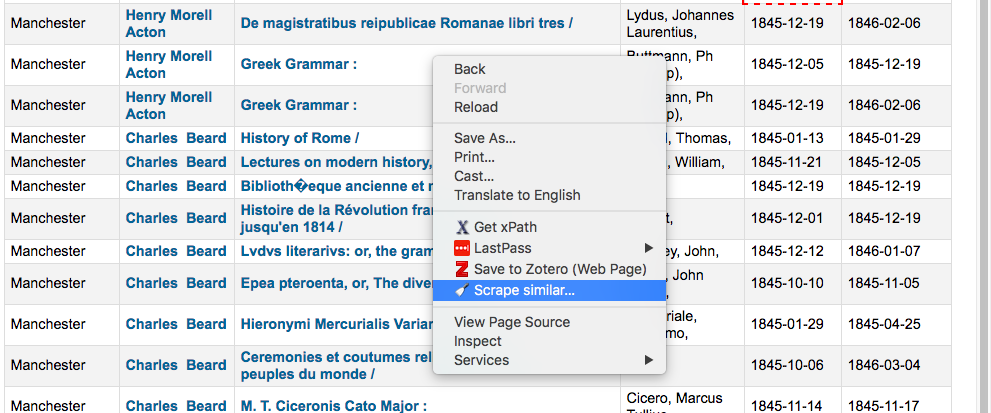
Okay, take a deep breath, then right click somewhere on the table of results and choose “Scrape similar…”
The Scraper window will appear.
Here’s where our XPaths come into play. Scraper has two text boxes. The one in the “Selector” section sets the starting XPath from which all of our other XPaths in the “Columns” section will begin. (The contents of the Selector text box will be dictated by where you happened to right-click when you opened Scraper, so your screen may look different from mine at this point.)
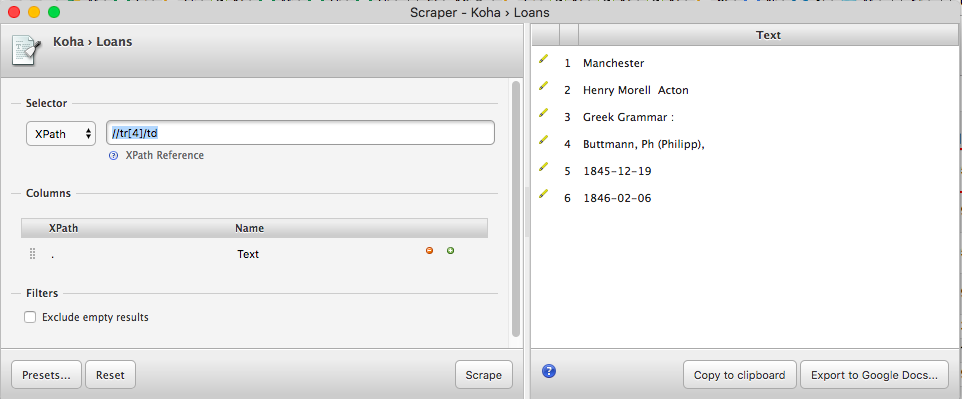
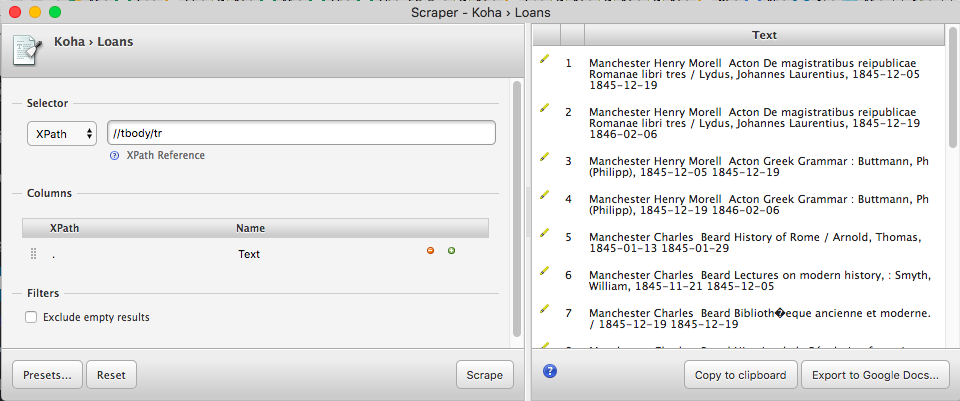
In the Selector text box, enter this XPath: //tbody/tr, then hit enter. Your preview should now look like this:
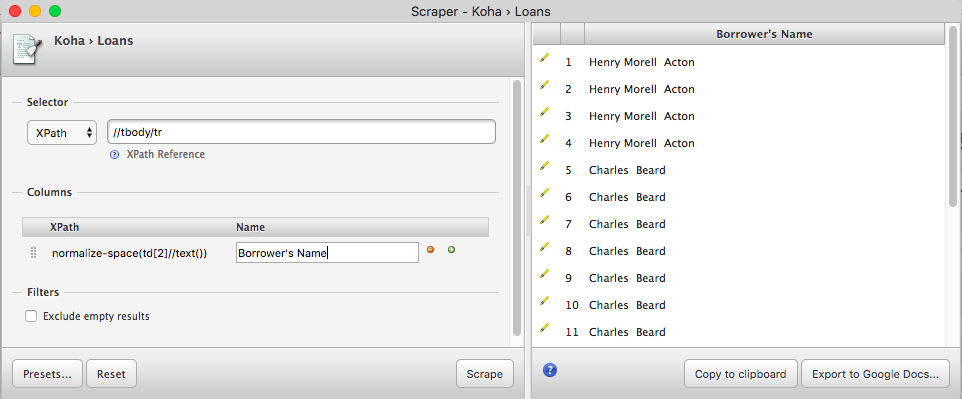
Notice how all the text from each row is dumped together into a line. We’re now going to break this up into a tabular form (for use in Google Sheets) by specifying which columns to scrape. Double-click on the first XPath (currently just a period) to edit it. Change the period to normalize-space(td[2]//text()) (more on that in a second); double-click on the label (currently “Text”) and change it to “Borrower’s Name,” then hit enter to update. Your preview should now look like this:
Remember that XPath is the “XML Path Language”: it can do more than just select DOM elements, it can also perform certain actions on them. Here, we used normalize-space() to remove some weird white space that happens to be present in td[2]. We’ll use a couple of similar tricks in what follows. Rather than explaining them here, I’ll just give you the XPaths to enter and refer the curious to the documentation of XPath functions provided by the Mozilla Developer Network.
Use the little green plus signs at the right of the Columns section to add new XPaths as follows:
| XPath | Label |
|---|---|
concat("http://bolas.server.qmul.ac.uk",td[2]/a/@href) |
Borrower Link |
td[3]//text() |
Title |
concat("http://bolas.server.qmul.ac.uk",td[3]/a/@href) |
Book Link |
td[4] |
Author |
td[5] |
Date Issued |
td[6] |
Date returned |
Once you have these XPaths set up, you’re ready to scrape the information and send it to a Google Sheet. In Scraper, you’ll see a button that says “Export to Google Docs…” If you had all the data you wanted, you could just click this button and Scraper would open a new tab with a new Google Sheet (assuming you’re logged in). We can’t do that in this case, though, because Dissenting Academies Online breaks the results up into groups of 20—our Google Sheet would only receive the first 20 records, not the 327 we’re after.
Instead, we’ll need to “Copy to clipboard”, create a new sheet at Google Drive and paste the contents of our clipboard into that sheet. You’ll have to repeat this process for each screen of results (don’t forget to delete the extra header rows that will get pasted in each time).
One strange gotcha: while the pager for these results at Dissenting Academies Online goes up to eleven, some quick arithmetic (11 x 20 = 220) will show that that won’t get us to the end of our result set. Once you’ve made it to the eleventh screen, you’ll need to move forward by changing the page parameter in the URL itself:
![]()
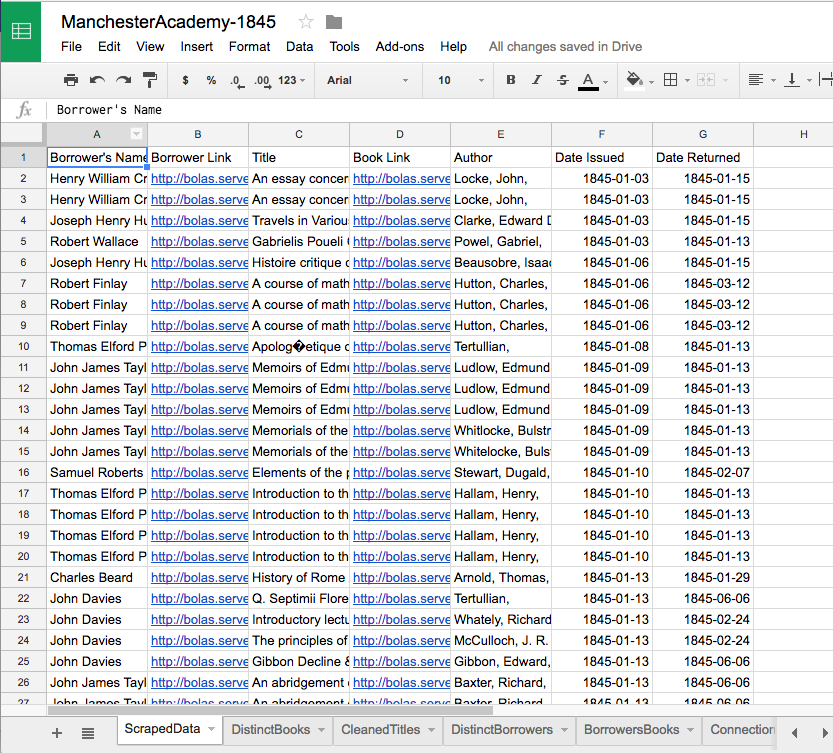
Just change the 11 to a 12, hit enter, and then copy the data to the clipboard and paste it into your sheet as usual. (Then repeat for 13-17.) When you’re done, you should have a Google Sheet that looks like this (barring the extra sheets at the bottom—we’ll get to that in Part II.)